
- Crafts & DIY
- Jul 26
2024-05-22
Introduction
Are you looking for a fun and engaging activity to entertain your kids? Look no further than the mesmerizing world of slime-making! Slime has taken the crafting world by storm, captivating children and adults alike with its squishy texture and endless possibilities. Today, we'll delve into the exciting realm of floam slime, a unique variation that combines the stretchiness of slime with the added fun of tiny foam beads. Get ready to embark on a creative journey with your little ones as we explore how to make the best floam slime right in the comfort of your home.
TIP: Keep a variety of art supplies on hand to inspire different types of creativity.
Materials Needed
To kickstart your floam slime adventure, gather the following materials:
How to Make Floam Slime
Now that you've gathered your materials, it's time to dive into the exciting process of making floam slime. Follow these simple steps for a sensory experience like no other:
Prepare the Glue Mixture: Start by pouring the white school glue into your mixing bowl. If you're feeling adventurous, add a few drops of food coloring to create your desired color palette. Mix thoroughly until the color is evenly distributed.
Activate the Slime: Add a pinch of baking soda to the glue mixture and stir until fully incorporated. Baking soda acts as a catalyst, helping to stabilize the slime and improve its elasticity.
Add the Contact Lens Solution: This is where the magic happens! Slowly pour the contact lens solution into the glue mixture while stirring continuously. As you do so, you'll notice the slime beginning to form and pull away from the sides of the bowl.
Incorporate the Foam Beads: Once your slime reaches the desired consistency, it's time to add the foam beads. Sprinkle a generous amount of beads into the slime and gently fold them in using your spoon. Feel free to experiment with different colors and combinations to create unique floam creations.
Knead and Play: Transfer the floam slime onto a clean surface and knead it with your hands to distribute the foam beads evenly. Encourage your kids to explore the tactile sensation of the slime and let their imaginations run wild!
Tips for Parents
Next Steps
Now that you've mastered the art of making floam slime, why not explore more exciting kids' activities and crafts? In the next section, we'll introduce you to a treasure trove of summer craft ideas guaranteed to keep your little ones entertained for hours on end. Get ready to unleash your creativity and make unforgettable memories with your family!
Introduction
Now that you're excited about diving into the world of floam slime-making, let's ensure you have all the necessary materials at your fingertips. In this section, we'll provide you with a comprehensive list of ingredients and tools required to concoct the perfect batch of floam slime. From basic household items to specialized components, we'll cover everything you need to embark on this exciting crafting adventure.
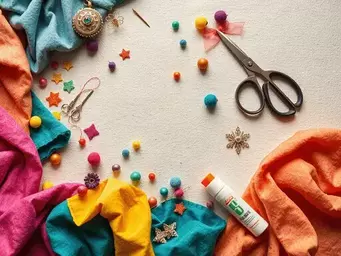
List of Materials
To create your own floam slime masterpiece, you'll need the following:
Brief Description of Each Material
Emphasis on Accessibility and Affordability
One of the best things about making floam slime at home is that the materials are readily available and affordable. You can find most of the ingredients at your local grocery store or pharmacy, making it a convenient and budget-friendly activity for families. By utilizing common household items, you can unleash your creativity and embark on a fun-filled crafting adventure without breaking the bank.
Next Steps
Now that you've gathered all the necessary materials, it's time to roll up your sleeves and dive into the exciting process of making floam slime. In the next section, we'll walk you through the step-by-step instructions for creating your own batch of squishy, crunchy floam slime right in the comfort of your home. Get ready to unleash your inner scientist and embark on a sensory journey like no other!
Dive into our article on Discover the details of guide summer fun kids for a complete overview. We cover all the essential points and provide a lot of useful information.
Introduction
Now that you've gathered all the necessary materials, it's time to dive into the exciting process of making floam slime. In this section, we'll provide you with detailed, step-by-step instructions to help you create the perfect batch of floam slime right in the comfort of your home. From mixing the ingredients to achieving the desired consistency, we'll guide you through every stage of the slime-making process. Get ready to unleash your creativity and embark on a sensory journey like no other!
Step-by-Step Instructions
Prepare the Glue Mixture: Start by pouring the white school glue into a mixing bowl. If desired, add a few drops of food coloring to achieve your preferred color. Stir the glue until the color is evenly distributed.
Activate the Slime: Add a pinch of baking soda to the glue mixture and stir until fully incorporated. Baking soda helps to stabilize the slime and improve its elasticity.
Add the Contact Lens Solution: Slowly pour the contact lens solution into the glue mixture while stirring continuously. As you do so, you'll notice the slime beginning to form and pull away from the sides of the bowl. Keep stirring until the slime reaches the desired consistency.
Incorporate the Foam Beads: Once the slime is formed, it's time to add the foam beads. Sprinkle a generous amount of beads into the slime and gently fold them in using a spoon. Continue adding beads until you achieve your desired floam texture.
Our blog post on Discover the details of enchanting magic science steam activities kids is a must-read for anyone interested in the subject. It’s filled with comprehensive details and thoughtful perspectives.
Knead and Play: Transfer the floam slime onto a clean surface and knead it with your hands to distribute the foam beads evenly. Encourage your kids to explore the tactile sensation of the slime and let their imaginations run wild!
Tips for Parents
Next Steps
Now that you've mastered the art of making floam slime, why not explore more exciting kids' activities and crafts? In the next section, we'll introduce you to a variety of related posts that are sure to inspire and entertain. From summer craft ideas to no-cook playdough recipes, there's something for everyone to enjoy. Get ready to unleash your creativity and make unforgettable memories with your family!
Introduction
As you embark on your journey of slime-making and creative fun with your kids, there's a world of exciting activities waiting to be discovered. In this final section, we'll introduce you to a selection of related posts that are sure to inspire and entertain. From summer craft ideas to sensory play recipes, there's something for every family to enjoy. So, without further ado, let's dive into a treasure trove of kids' activities and crafts that will spark your imagination and ignite your creativity!
Related Posts You May Like
100 Ultimate Summer Craft Bucket List Ideas (with free printable!): Dive into the endless possibilities of summer crafting with this comprehensive list of fun and creative activities. From DIY projects to outdoor adventures, you'll find inspiration for every day of the summer holidays.
Top 10 No-Cook Playdough Recipes for Summer: Keep your kids entertained for hours with these easy and no-cook playdough recipes. With a variety of textures and scents to explore, your little ones will love getting their hands dirty and unleashing their creativity.
How to Make The Best Cloud Dough: Step into the magical world of cloud dough with this simple and sensory-rich activity. Perfect for tactile play and sensory exploration, cloud dough is sure to captivate your kids' imaginations and provide hours of entertainment.
Key Takeaways
FAQs
Q: Are these activities suitable for kids of all ages? A: Yes! The suggested activities cater to a wide range of age groups, from toddlers to tweens, ensuring that there's something for everyone to enjoy.
Q: How can I incorporate these activities into our daily routine? A: Schedule regular crafting and sensory play sessions as part of your weekly routine to provide consistent opportunities for creative expression and exploration.
Q: What are the benefits of engaging in these activities with my kids? A: Engaging in hands-on activities and crafts promotes cognitive development, fine motor skills, and imaginative play while fostering parent-child bonding and communication.
Conclusion
As you explore the world of kids' activities and crafts, remember to embrace the joy of discovery and the magic of imagination. Whether you're creating slime masterpieces or embarking on summer crafting adventures, cherish these moments of creativity and connection with your little ones. With a plethora of fun-filled activities at your fingertips, the possibilities are endless!