Unlocking Creativity and Bonding with Your Little Ones
As the holiday season approaches, many of us are thinking of ways to make this time of year special for our children. One way to create lasting memories and foster a sense of closeness with your little ones is by making homemade Christmas cards together. In this article, we'll explore the joy of creating magical memories with your kids through the art of homemade Christmas cards.
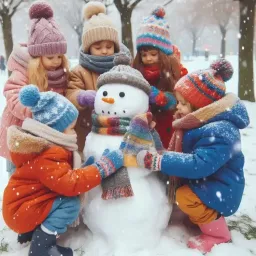
Making homemade Christmas cards with your kids is an excellent way to encourage creativity, develop fine motor skills, and practice patience and perseverance. It's a fun and interactive way to bond with your child, creating a sense of togetherness and collaboration. As you work together, you'll have the opportunity to chat, laugh, and make memories that will last a lifetime.
Creating homemade Christmas cards also allows your child to express themselves and their unique perspective on the holiday season. You'll be amazed at the creativity and imagination they bring to the table (or craft table, in this case!). It's a chance for them to explore different materials, textures, and colors, and to experiment with different techniques and ideas.
TIP: Incorporate educational elements into fun activities to enhance learning.
Moreover, making homemade Christmas cards is a great way to teach your child about the value of handmade gifts and the thought and effort that goes into creating something special. In an era of mass-produced, commercialized holiday cards, a homemade card stands out as a truly personal and meaningful gesture.
In the following sections, we'll dive deeper into the world of homemade Christmas cards, exploring the materials and supplies you'll need, creative ideas and themes to inspire your child's imagination, and step-by-step guides to help you create unique and adorable cards together. So, let's get started on this festive adventure and create some magical memories with your little ones!
Remember, the most important aspect of making homemade Christmas cards is the time spent together, the laughter, and the memories created. So, don't worry too much about perfection – it's the thought and love that counts!
By the end of this article, you'll be equipped with the inspiration, ideas, and guidance needed to create a treasured keepsake with your child. So, gather your materials, grab a cup of hot cocoa, and get ready to unleash your child's creativity and make some unforgettable holiday memories!
Materials and Ideas for Inspiring Young Artists
Before diving into the world of homemade Christmas cards, it's essential to gather the necessary materials and supplies to unleash your child's creativity. In this section, we'll explore the must-haves for a fun-filled craft session, as well as some innovative ideas to inspire your little artists.
Gather 'Round: Essential Supplies for a Fun-Filled Craft Session
To get started, you'll need a few basic supplies that can be found in most craft stores or around the house. Here's a list of essentials to get you started:
Construction paper (various colors and textures)
Cardstock (white or any other color of your choice)
Glue (white school glue, hot glue, or glue sticks)
Scissors (safety scissors for young children or sharp scissors for older kids)
Markers or colored pencils
Crayons or paint
Stickers, stamps, or other embellishments (optional)
Photos or other personal elements (optional)
Remember, the key to a successful craft session is to have a variety of materials on hand to spark your child's imagination. Don't be afraid to get creative and add your own unique touches to the project!
Unleashing Imagination: Innovative Ideas for Kids' Christmas Cards
Now that you have the necessary supplies, it's time to unleash your child's creativity! Here are some innovative ideas to get you started:
Handprint art: Use paint or markers to create handprint reindeer, snowmen, or other festive designs.
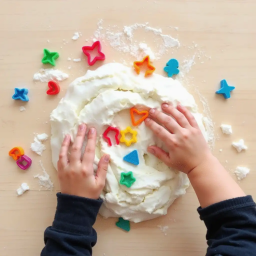
Finger painting: Let your child's fingers do the talking with vibrant, messy, and fun finger-painted masterpieces.
Collage techniques: Cut out shapes and glue them onto the card to create a unique collage effect.
Stamping: Use potato stamps, foam stamps, or even household items like sponges or leaves to create fun patterns and designs.
Recycled materials: Encourage your child to think outside the box by using recycled materials like old cards, newspaper, or fabric scraps.
Remember, the most important thing is to let your child take the reins and guide the creative process. Encourage them to experiment, try new things, and have fun!
Adding a Personal Touch: Photos, Messages, and More
To make your homemade Christmas card even more special, consider adding a personal touch. Here are a few ideas to get you started:
Photos: Add a favorite photo of your child to make the card even more personal.
Heartfelt messages: Encourage your child to write a heartfelt message or signature to make the card extra special.
Unique elements: Incorporate other unique elements like stickers, stamps, or even a lock of hair to make the card truly one-of-a-kind.
By adding a personal touch, you'll create a treasured keepsake that will be cherished for years to come. So don't be afraid to get creative and make it your own!
Step-by-Step Guides for Creating Unique and Adorable Cards
Now that you have all the necessary materials and ideas, it's time to get creative and make some magical Christmas cards with your kids! In this section, we'll dive into three step-by-step guides for creating unique and adorable cards that will surely impress family and friends.
Finger Painting Fun: A Simple yet Stunning Christmas Card
Finger painting is a great way to get kids involved in the creative process, and the results can be truly stunning. Here's a simple guide to creating a beautiful finger-painted Christmas card:
Materials needed:
Finger paints (various colors)
White paper or cardstock
A smock or old shirt to protect clothing
A paintbrush (optional)
Step-by-step instructions:
Start by giving your child a piece of paper or cardstock and a smock to wear. Explain the concept of finger painting and demonstrate how to dip their fingers in the paint.
Encourage your child to paint whatever they like – trees, snowflakes, reindeer, or even a festive holiday scene.
As they paint, you can add some guidance and suggestions, but remember to let their creativity shine!
Once the painting is complete, let it dry completely before adding any additional details, such as glitter, stickers, or a message.
Finally, attach the painting to a piece of cardstock or a blank card, and you're done!
Tips and variations:
Experiment with different finger painting techniques, such as swirling, dabbing, or stamping.
Add some texture to the painting by using different materials, like glitter, stickers, or even fabric.
Try using a paintbrush to add some finer details, like eyes or a nose, to your child's painting.
Popsicle Stick Masterpieces: A 3D Christmas Card Tutorial
Who doesn't love a good 3D card? With just a few simple materials, you and your kids can create a stunning 3D Christmas card that will stand out from the rest.
Celebrate New Year's Eve with children by organizing a countdown party, creating time capsules, making DIY noisemakers, and baking festive treats. You can also set up a photo booth with fun props and play family-friendly games to keep the excitement going.
Organize a fun and educational summer camp at home by planning themed weeks, such as science week, art week, or nature week. Include activities like experiments, crafts, outdoor adventures, and cooking classes. Create a schedule to provide structure and ensure a variety of engaging experiences.
Materials needed:
Popsicle sticks
Glue
Scissors
Cardstock or construction paper
Other embellishments (optional)
Step-by-step instructions:
Start by cutting a piece of cardstock or construction paper into a rectangular shape, slightly larger than a standard card.
Cut several popsicle sticks to the same height, depending on how tall you want your 3D design to be.
Glue the popsicle sticks to the cardstock, spacing them evenly apart to create a 3D effect.
Decorate the popsicle sticks with glue, glitter, stickers, or other embellishments to add some festive flair.
Once the glue is dry, add a message or a photo to the front of the card, and you're done!
Tips and variations:
Experiment with different shapes and designs, like a Christmas tree or a snowflake.
Use different materials, like straws or craft sticks, to create a unique 3D effect.
Add some movement to your design by attaching the popsicle sticks with a small piece of tape or a paper clip.
Handprint Magic: Turning Tiny Hands into Festive Art
Handprint art is a classic way to capture the magic of childhood, and it's especially fun during the holiday season. Here's a simple guide to creating a beautiful handprint Christmas card:
Materials needed:
Paint (various colors)
Paper or cardstock
A smock or old shirt to protect clothing
A paintbrush (optional)
Step-by-step instructions:
Start by giving your child a piece of paper or cardstock and a smock to wear. Explain the concept of handprint art and demonstrate how to dip their hand in the paint.
Encourage your child to place their hand on the paper, making sure to spread their fingers apart to create a festive shape.
Use a paintbrush to add some details, like eyes or a nose, to the handprint design.
Let the paint dry completely before adding any additional details, like glitter, stickers, or a message.
Finally, attach the handprint art to a piece of cardstock or a blank card, and you're done!
Tips and variations:
Experiment with different handprint shapes, like a reindeer, snowman, or even a festive holiday wreath.
Add some texture to the handprint design by using different materials, like glitter, stickers, or even fabric.
Try using different paint colors or techniques, like layering or stamping, to create a unique effect.
With these step-by-step guides, you and your kids can create some truly magical Christmas cards that will be treasured for years to come. Remember to have fun and be creative – it's all about making memories with your little ones!
Cherishing the Memories: Displaying and Preserving Your Child's Creations
As you and your little ones create those precious homemade Christmas cards, it's essential to think about how you'll showcase and preserve them. After all, these unique creations are more than just festive decorations – they're treasured keepsakes that capture the magic of childhood. In this final section, we'll explore some creative ways to display and store your child's masterpieces, ensuring they remain a cherished part of your family's holiday traditions for years to come.
Displaying Your Child's Masterpiece: Ideas for Showcasing Homemade Cards
Once your child has finished creating their homemade Christmas card, it's time to show it off! Here are some fun and creative ways to display their masterpiece:
Card Display Tree: Create a mini Christmas tree or a card display stand using cardboard, felt, or paper maché. This will allow you to showcase multiple cards at once, creating a beautiful and festive display.
Framing: Choose a few special cards and frame them, just like you would a piece of art. This will not only protect the card but also make it a beautiful addition to your holiday decor.
Garland: String together multiple cards to create a colorful garland that you can hang along your mantel, staircase, or even across a window.
Shadow Box: Create a shadow box using a deep frame or a wooden box, and fill it with multiple cards, photos, and other holiday memorabilia.
These display ideas will not only add a personal touch to your holiday decor but also make your child feel proud of their creation.
Preserving the Magic: Tips for Storing and Revisiting Past Creations
As the years go by, it's essential to store your child's homemade Christmas cards in a way that will preserve their condition and make them easy to revisit. Here are some tips for storing and preserving your child's creations:
Acid-Free Storage: Use acid-free paper, folders, and boxes to store your child's cards. This will prevent them from yellowing or deteriorating over time.
Individual Sleeves: Store each card in an individual sleeve or envelope to protect it from damage and dust.
Labeling: Label each card with the year, your child's name, and a brief description of the card. This will make it easy to find specific cards and reminisce about past holiday seasons.
Digital Backup: Take high-quality photos of each card and store them digitally, creating a digital archive of your child's creations.
By following these storage tips, you'll be able to revisit and cherish your child's homemade Christmas cards for years to come.
Conclusion and Call to Action: Start Creating Your Own Homemade Christmas Cards Today!
As we conclude this guide to creating magical homemade Christmas cards with kids, we hope you're feeling inspired to start making your own festive creations. Remember, the true magic lies not in the final product but in the process – the laughter, the bonding, and the memories you create with your little ones.
So, gather your materials, gather your kids, and get creative! With these tips and ideas, you'll be well on your way to creating a treasured collection of homemade Christmas cards that will be cherished for generations to come. Happy crafting, and happy holidays!